Location: Planetoid G0-V-IX-K29377 in the sparse stony planetoid belt of the outer Barka-Athune system (Halcyon 2424)
Date: 297–5600
Travellers: Torka Jax, Jacobe Kyman, Nogudnyk, Griff Kodiak, Ada Windsor
The pirate ship approaches. You have less than an hour to put a plan into motion. You decide to set an ambush that will allow you to bloody their noses, then flee ... or re-evaluate, depending on the outcome.
The ace up your sleeve is the double pulse laser turret in the crashed far trader. It's a pop-up turret, which means the pirates don't know it's there. If you can lure the marauder in close (i.e., a range of less than about 10 km), you can target it with the two single turrets on the Dejah Thoris and the double turret on the Azimuth and the pirate won't be able to deploy the missiles its captain claims to have. There's only one catch: you'll need to restart the power plant on the downed ship. Fortunately, Jacobe and Torka have the requisite skills.
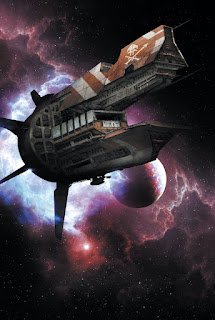 |
| The menacing corsair Wyvern |
With the assistance of several hand-picked robots, you set to work on the
Azimuth's reactor. After nearly thirty minutes of feverish work, you succeed in restoring power. Even better, Griff is able to link the double turret to the
Dejah so that you can operate its lasers using the latter's fire control systems. The jury-rigged system wouldn't pass muster on a navy ship, but it'll suffice for present needs. In the meantime, Ada brings the
Dejah in close to the wreck of the
Azimuth: a magnet of riches to draw in the corsair. The menacing corsair gradually comes to hover over the planetoid about 5 km above you. You can pick out the ship's name: the
Wyvern.
Your comms crackle to life as the pirate captain hails you again. He reiterates his promise to maroon you here if you surrender without resistance. Nogudnyk buys you extra time to prepare your ambush through artful banter that confuses and confounds the pirate, who can't tell if you are submitting, flirting, or defying. Just as his patience is about to break, you spring the surprise.
Four pulse lasers target the Wyvern simultaneously from close range. You manage to damage its M-drive and sensors: it's blind and drifting! Lifting off, the Dejah Thoris races over the planetoid's surface and flees to safety on the far side of the barren rock. The Wyvern's gunners manage to snap off a shot with one of their own pulse lasers, but it goes wide of the mark ... and strikes the double turret on the Azimuth!
Circling the planetoid, you take stock of the situation. No missiles were fired: was the pirate bluffing, or were they unable to target you due to the damage suffered by their sensor array? Is is time to flee into the nearby asteroid belt or go another round with the pirate? Emboldened by the success of your ambush, you opt for the latter course.
When you again rise into view of the Wyvern to fire your lasers, the ship is still drifting motionless above the planetoid. You score some more hits but, to your consternation, you realize that the pirates have evidently managed to repair the sensors: a cloud of missiles suddenly appears on your scope, racing towards you at 10G.
A familiar choice beckons: fight, or flee? Of course, neither will be an option if you don't survive those missiles ...
Image credit: Pirate ship illustration by Joshua Meehan, created for Ironsworn: Starforged by Shawn Tomkin.


Comments
Post a Comment
Thank you for your comment! It will be reviewed before posting.